A Step-by-step Guide to Creating a "Now Page" with Ghost
A guide through creation of "now page" using Ghost with convenient automations like tweeting or posting on Facebook when the page is updated. The post covers use of Ghost's Dynamic Routing to persist now page history.


Have you heard of a "now page" concept before? The term has been popularized by Derek Sivers. I first heard Derek talking about now during a podcast with Tim Ferris. The quote from the now site's about page describes the concept best:
Most websites have a link that says “about”. It goes to a page that tells you something about the background of this person or business. For short, people just call it an “about page”.
Most websites have a link that says “contact”. It goes to a page that tells you how to contact this person or business. For short, people just call it a “contact page”.
So a website with a link that says “now” goes to a page that tells you what this person is focused on at this point in their life. For short, we call it a “now page”.
If you have a personal site or a blog there's a good chance you are already a part of the "now.now.now" movement. If not, having a link saying “now” that takes you to a page with content about what's going on in your life right now is a great start. Join in!
I love the concept of "now pages" on people's sites. It gives a much better understanding of what the person is up to, what are they doing with their life right now, over what topics we could connect. Oftentimes, overcrowded social media tweets and posts create too much noise. From all the noise, it's hard to pick up the signal. What is the person currently focused on?
What's the problem this guide solves?
Not one but a few of them! As I was updating my now page the other day, few things clicked:
- I'm losing the record of my previous updates. Every time I update the page it overwrites previous content.
- I'd like to let people know about the updates through my Twitter.
- Most people, myself included, forget to update these pages!
The list above gave a strong signal to scratch my own itch. Maybe, a few more people will benefit from an easy-to-follow guide on now page management as well. Also, I love automating mundane tasks and getting small problems like these out of the way.
Let's get to work, let's fix things up! The brain immediately started going into an "idea sex mode" - coined by James Altucher in his "Skip the Line" book. Initially, I thought about all the code I could write to do smart synchronization and send API requests here and there...
Few sips of coffee...
Why spend the whole weekend coding not validated idea? There is enough power in the tools I already use and require zero code. One, current now page is managed through Ghost. Two, Ghost integrates well with Zapier and could tweet/post/what-have-you without breaking a sweat. As for the third problem, I would definitely come up with a solution in the process 😎
I'll break down this guide into couple of sections with an easy, fully automated flow I came up with. Feel free to skip to any of the sections depending on how complex you'd like your "now page" to be.
Here's a ToC for your convenience:
- Setting up a basic "now page" using Ghost
- Setting up "Now" link in site's navigation
- Automating now page updates with Zapier
- Advanced "now page" with history
- NOTE, the rest of the items in the menu are WIP ;)
- Allowing your audience to ask for an update (peer pressure of a sort!)
- Automating now collection page with Zapier
Ready? Open up your Ghost admin page and let's dig in!
Prerequisites
Your site should be running a Ghost instance. Best if it's up to date - on the latest Ghost 4.x (4.9.3 at the time of writing). If you don't have a website and would like to set up a Ghost site, these docs will guide you through.
A Basic "now page"
Here's a video demonstrating how to add it in just one minute
Or follow step-by-step:
- In your Ghost Admin add a new "page"
- Choose "Pages" in the left-hand menu.
- Choose "New page" in the top right corner.
- Type in "Now" for the page title - you can change it to anything you want later.
- Write about what you are up to right now in the page's content. Like: "rediscovering traditional Slav plum fermentation techniques". Anything you want!
- Open up page settings menu by selecting "panel" icon in the top right corner.
- Add a "now" tag in the "Tags" select box.
- Hit the "Publish" button on the top right side.
- You are all done! Access your "now page" at "/now" address and share it with your friends.
Adding "now page" to the site menu
If you'd like this page to be visible on your site on the "primary" or "secondary" menu, follow these steps in the Ghost Admin:
- Go to the settings page by choosing a "gear" icon at the bottom left.
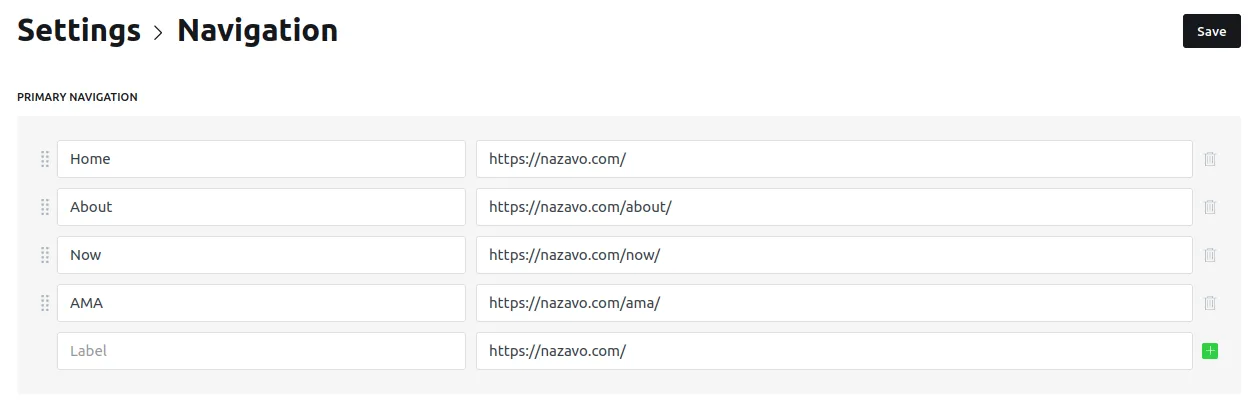
- Select "Navigation" in the "Website" group.
- Add a "Now" label in either "Primary Navigation" or in "Secondary Navigation" sections.
- Type in "now" next to the "Now" label.
- Hit save...
- Your "now page" is accessible from the main page's navigation!
Getting Zapier to tweet your now page updates
TLDR: use this tweet when "Now page" published Zap.
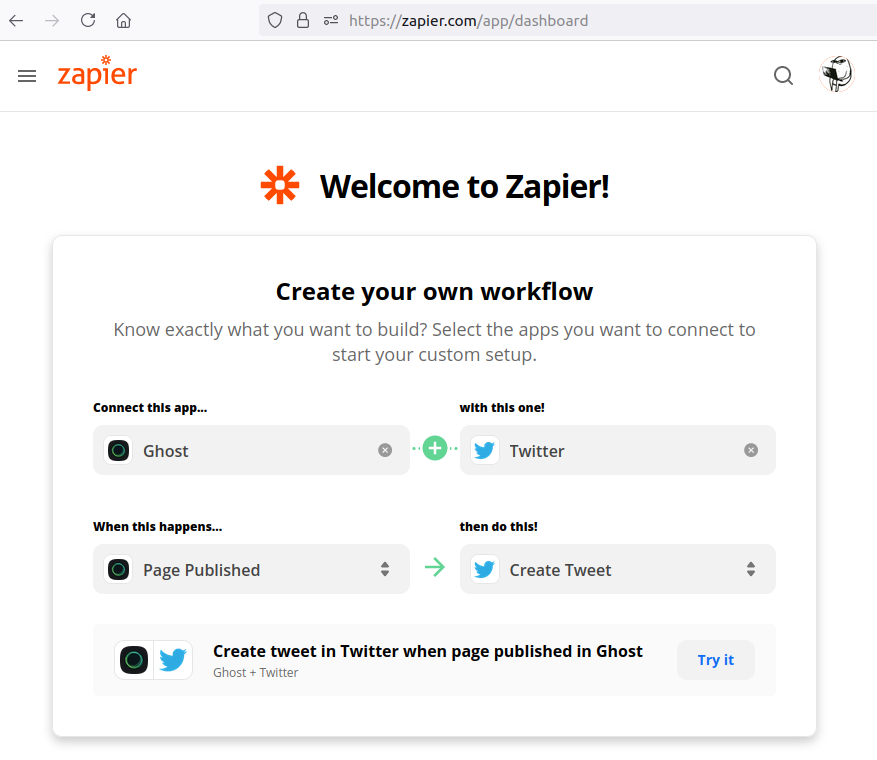
To configure the Zap from scratch. Go to your Zapier's account dashboard and configure a new workflow like so:
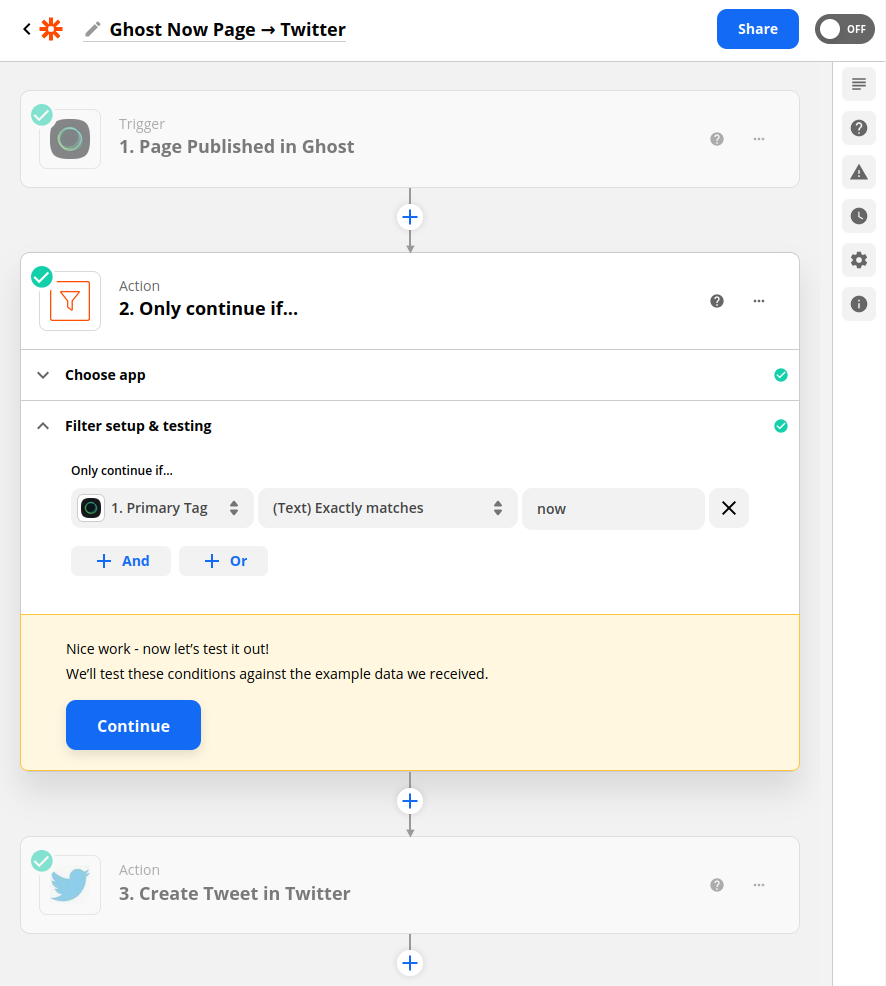
After clicking "Try it" you'll land in the Zap builder screen. Where you'll be buided to connect your Ghost site (if not connected yet). To send tweets only when the "now page" is updated create a "Filter" step which will let the flow run only if the "Primary Tag" in the page is matching "now". Remember we set this tag in the sixth's step here? This is why :)
Note. This bit is only "half-way" automatic because you'll still need to remember to "Unpulish" and "Publish" your now page to trigger the Zapier automation. This limitation is here because Ghost's Zapier integration doesn't support "Page Updated" triggers at this moment.
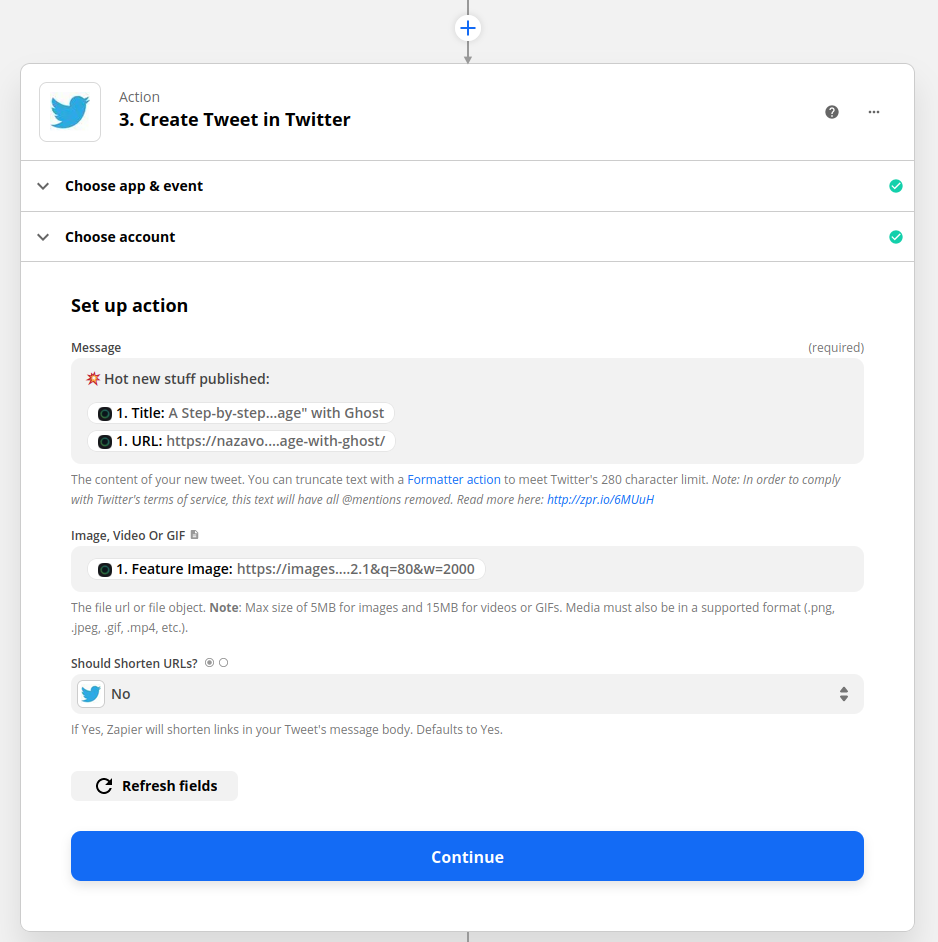
As the last step, connect and configure the "Create Tweet" step to your liking. I chose this configuration:
Be careful whet clicking "test this Zap" in the end of the workflow configuration. It might publish an unfinished piece of content just like it did with this very post:
💥 Hot new stuff published:
— Naz Avó 🇦🇪 (@naz_avo) July 11, 2021
A Step-by-step Guide to Creating a "Now Page" with Ghosthttps://t.co/Ug8FBrh7Eu pic.twitter.com/5HyLU5BIw9
In a very similar way, you'll be able to configure a Zap posting to Facebook, Reddit, or whatever medium of choice you have. Don't be afraid to experiment, nothing will explode!